Archive for the ‘ Photoshop Tutorial/Walkthrough ’ Category

Intense

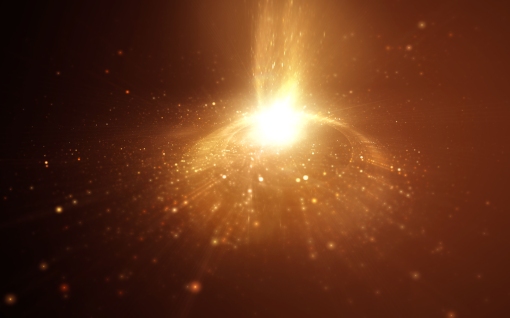
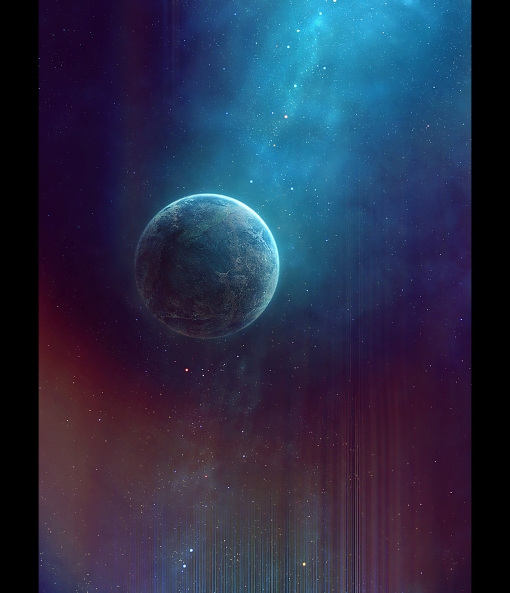
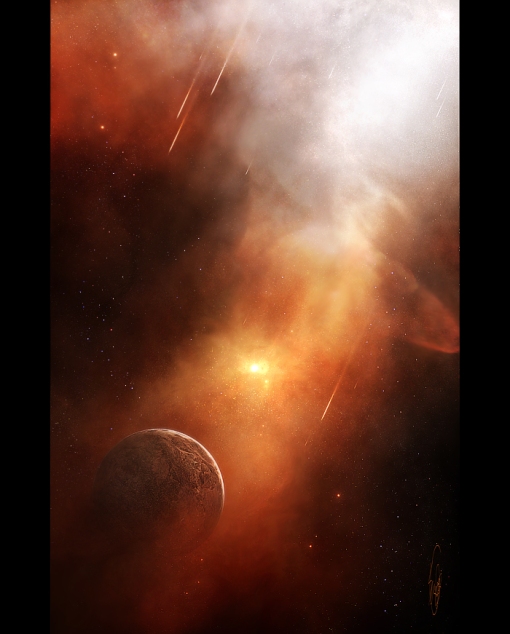
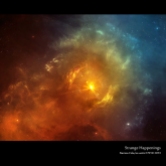
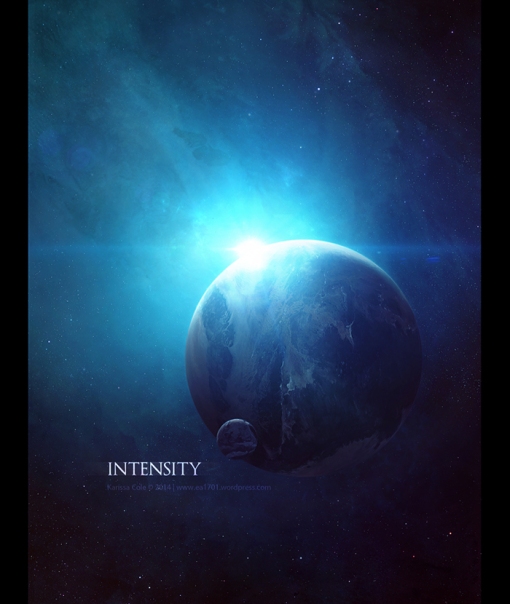
Occasionally I just get this surge of I MUST CREATE SOMETHING and I manage to sit down and do something I enjoy. This happened last week when I made this:

Intensity by ea1701 2014

Through the fog of still being in dire need of deep sleep I sat down Saturday or Sunday last weekend and made a spacescape, one of my first loves. I think it came out pretty nice. And as always, it felt nice to do something creative.


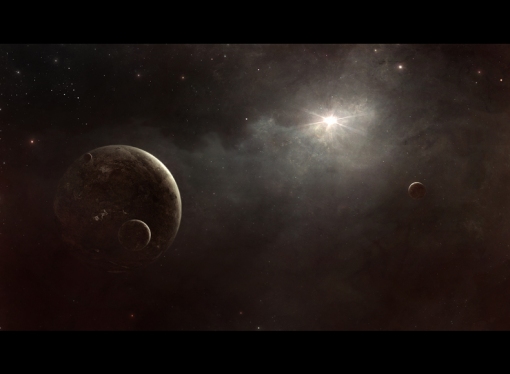
Spaced Out Blue Period

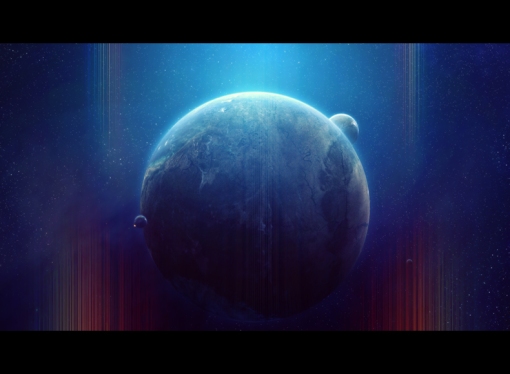
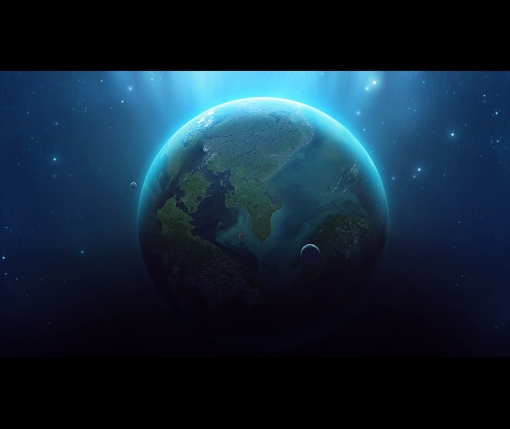
I legitimately did not realize it was November until I previewed this mini-blog post and saw the date in the upper left corner. I can’t help but wonder what would’ve happened if I had waited until tomorrow, or next week to kill some time in Photoshop by making these two simple celestial-themed wallpapers and then posting them here. I mean, it might’ve been weeks before I realized the month had passed. Given my state of mind, it would not surprise me much..

ea1701 practice space 3

ea1701 practice space 4

I am supremely tired, and in one of those I-wish-I-could-fall-asleep-and-never-wake-up kind of moods.  But every time I close my eyes my brain goes into overdrive. I can’t even get to sleep. So, I thought I’d blog.  I’ve got to do something, and I’m too tired to do anything else.

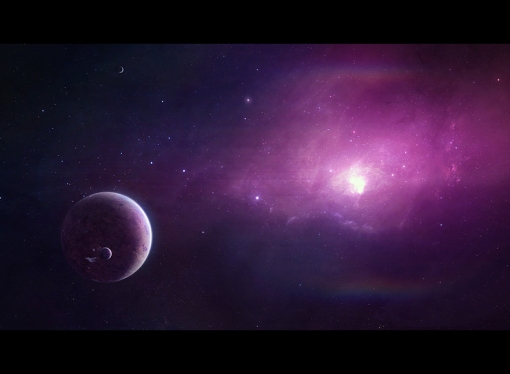
Here are some other quick ‘scapes I’ve done up over the past couple of days:

ea1701 practice space 1 ea1701 practice space 2 Practice by Karissa Cole 3 2013

This one is a free PSD download. Click the image to be directed to deviantART.

This one is a free PSD download. Click the image to be directed to deviantART.

I’ve gotten myself into the habit of using really saturated, over the top colors in my pieces (as you can plainly see). The two pieces I made today, at the top of this post, are a bit less gaudy.  I like ’em, and I want to try to get back into that style. I would also like some banana pancakes. We shall see which of these goals I am able to meet first.

Ciao.

Bad mood and pretty things.

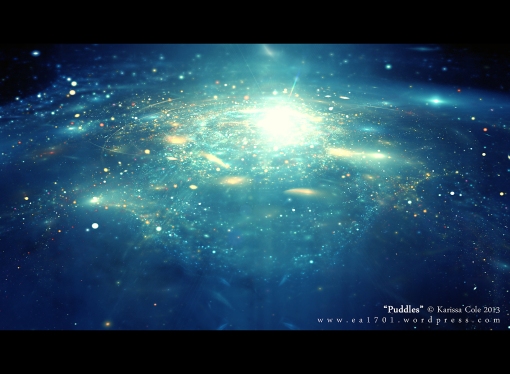
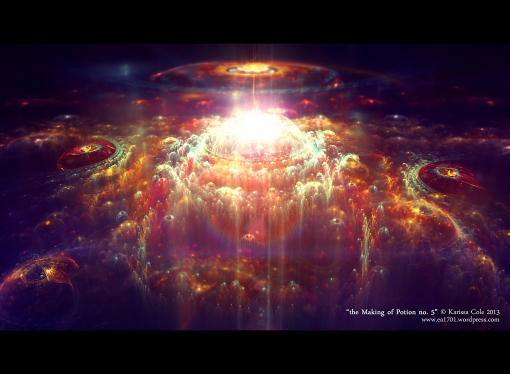
I have just had a terrible evening and am now in an incredibly bad mood. But I will pause my angry rampaging long enough to share with you the pretty things I made in Apophysis 7x earlier today. That way I can look back on this day in the future and remember that at least something good came from it

Pretty things (I think they are, anyway):

"Puddles" © 2013

“Puddles” © 2013

"the Making of Potion no. 5" © 2013

“the Making of Potion no. 5” © 2013

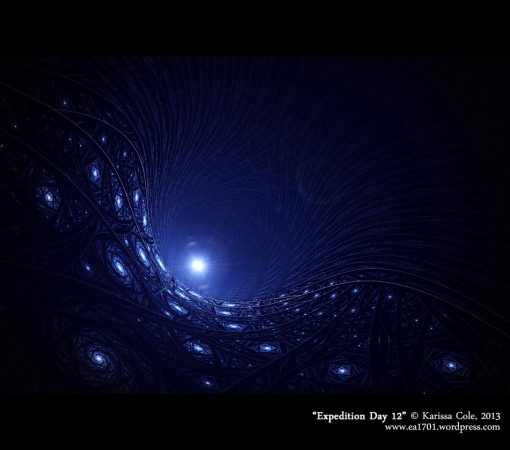
"Expedition Day 12" © 2013

“Expedition Day 12” © 2013

This last one, “Expedition Day 12,” is my favorite of the ones I made today. I may explore the techniques I used in that one some more. Tomorrow, maybe. Right now I shall now return to the brooding and and bad moodiness I was so enjoying before. May the happy sprites find me soon and take away all my pissedoffedness.

Until then.

Au revoir

Dreamscape

I have been feeling freakishly prolific lately. Hunkered down in my fortress of awesomeness, living off Junior Mints, white tea, and lots of rad music, I’ve been so completely absorbed in my various projects, I might as well be in another dimension.

Sweet, right?

Most recently I’ve done up a trio of spacescapes. They’ve all been uploaded to my gallery on devaintART, but I am admittedly, possibly insufferably, pleased with these pieces at the moment, so I thought I’d share them here too, along with the layer breakdowns. Each of the breakdowns can be viewed full-size, just click the image. They’re not walkthroughs, exactly, as the process behind things I make is actually pretty darn haphazard. I add and delete layers completely randomly until I come up with something I like. So the breakdowns just give a basic idea of what elements make up the final piece. I thought it’d be kind of cool to show them as well, instead of just throwing up a finished design. Who knows, maybe they’ll even be helpful to some other artist out there or something.

So first up, I created “Marvel”. I had just watched, like, six Marvel movies in the past week before making this particular ‘scape. One of them was playing in the background when I was trying to come up a name for this piece…I think you see where I’m going with this…

Marvel layer breakdown by Karissa Cole ea1701 2013

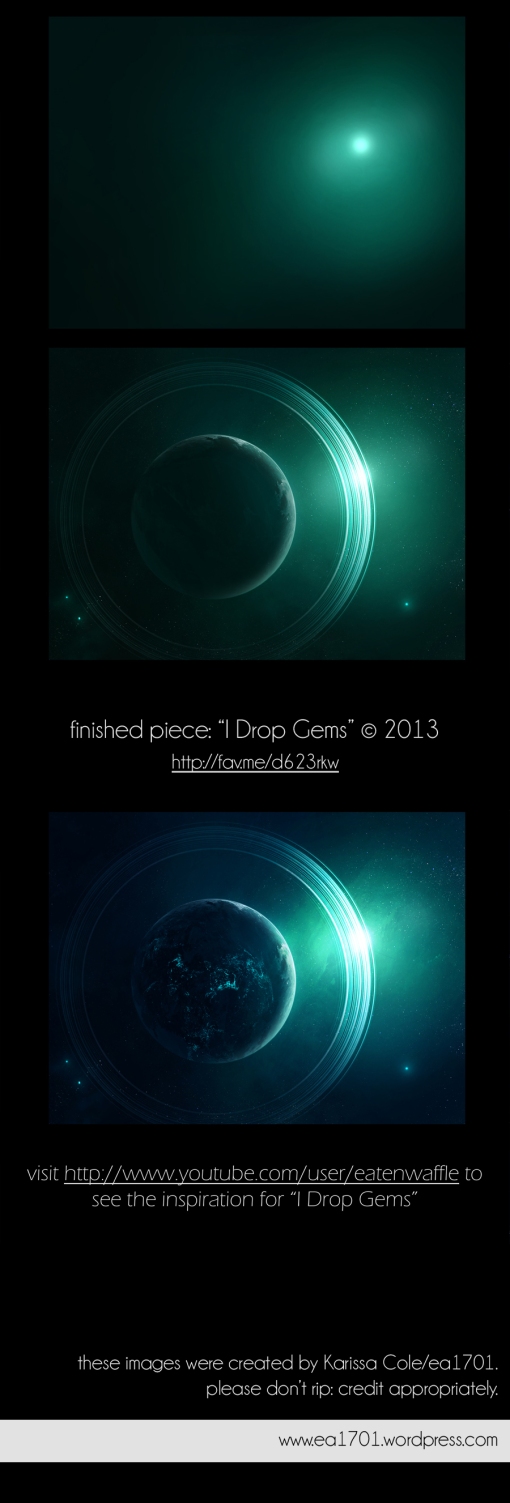
The day after finishing “Marvel,” I dove right into created this next piece, “I Drop Gems”. Named after “I Drop Gems” by _ensnare_. There really are no words apt enough to describe how awesome this song is. Seriously, if this is your bag, check it out. You may very well fall in love. Don’t judge right away, though. Let it’s awesomeness build up and surround you first.

Besides being named after one of my favorite pieces of music, this work of mine is inspired by eatenwaffle, who I wish had more videos. (You can find eatenwaffle under a different name on deviantART.) There’s not too much of it, but this artist’s work is really stunning. I definitely recommend checking it out if you have the time.

So, here’s the breakdown of my “I Drop Gems”:

I Drop Gems layer breakdown by Karissa Cole ea1701 2013

Finally, after finishing “I Drop Gems,” I thought to myself I should really do a third piece, as three seemed like a nice round number of new designs, so I got to work on “Dreamscape”:

Dreamscape layer breakdown by Karissa Cole ea1701 2013
Of all the ways I could think of to spend three days, traversing the galaxy without even having to change out of my pajamas isn’t all that bad an option.

All That Glitters – Apophysis/Photoshop Tutorial

What you need:

• the free fractal program Apophysis 7x
• photo editing software, such as Adobe Photoshop
• and basic knowledge of how to use both

What we’ll be making:
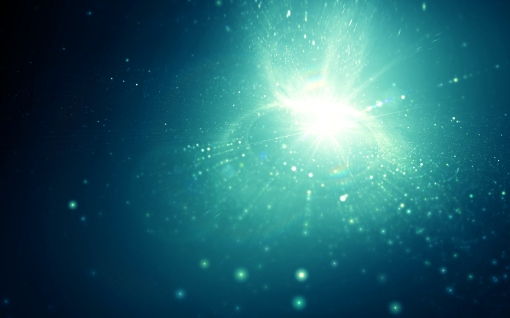
PS - 9 All That Glitters - Apo_Photshop Tutorial by Karissa Cole

Personally, I think a good tutorial should both clearly explain how the specific piece was made (so you don’t go nuts stuck with generalities, trying to figure out how they got that one detail just right), and provide several variations to try (so you’re not stuck with an exact replica of someone else’s work.) This is what I’ve tried to do here. If you follow the following steps closely, your result should look very similar to the image above. But I’ve also listed some variations you can try, so you can completely customize your final fractal.

Some things to note before you begin:

• This tutorial assumes you’ve already got working knowledge of Apophysis – how to create a flame and new transforms, where to enter in variations and variables, and how to make overall image adjustments. If you’re completely new to the program check out the Apophysis F.A.Q and be sure to also check out this icon-identifying tutorial as well.

If you use this tutorial – especially if you follow the steps to the letter – please respect my artistic rights and link people back to this blog. This is a courtesy to others who may wish to learn how to use this technique and to me (after all, I spent all this time creating this tutorial – and if you like it enough to use and show off, then I deserve a bit of credit.)

This whole process is fairly quick – less than an hour from start to finish. But as with all digital art endeavors, it might be a good idea to save your progress frequently to avoid losing anything you make.

If you are not specifically instructed to change the value of a certain variation, leave it at its default setting. For example, the default variations for a transform are: linear3D: 1; everything else: 0. If you are asked to change julian to 2 but nothing else is mentioned, only change julian, and leave linear3D at its default value of 1. This applies to weight values (default: 0.5), too.

Screen shots follow each step. Click any screen shot to see it larger.

When ready to begin, start off by opening up Apophyis 7x (or whichever version you have – it just must be 3D capable) and create a new blank flame.

Impatient folk – like me – who just need to know the bare essentials of this flame should take a look at the following (however, those who want the step-by-step with pictures can just treat this as a summation of what we’ll be doing):

xform 1)
• Weight: 0.05
• noise = 0.15 (try experimenting with values between 0.1 and 1.0)
• blur = 0.25 (try experimenting with values between 0.1 and 2.0)
xform 2)
• Weight: 0.95
• linear3D = 0.2
• spherical = 0.75 (try experimenting with values between 0.45 and 0.95)
xform 3)
• scale down twice; move and flip
xform 4)
• scale down twice; move and flip
xform 5)
• linear3D = 0
xform 6)
• linear3D = 0
• julian = 2; julian_power = 2

Depth blur: 0.2
Pitch: 60
Yaw: 10
Perspective: 0.7
Scale: 110
Gamma: 2
Brightness: 12

Step-by-step:

Open up the Transform Editor and make the following adjustments to Transform 1:

Weight: 0.05
noise = 0.15 (try experimenting with values between 0.1 and 1.0)
blur = 0.25 (try experimenting with values between 0.1 and 2.0)

Not much should be happening so far, so don’t worry if all you get is a bunch of “static”.
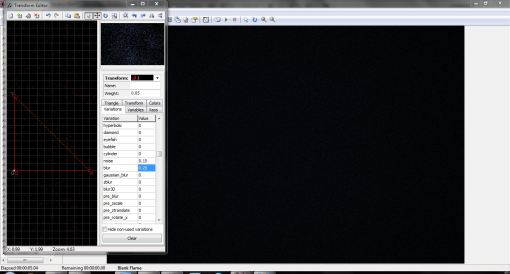
xform1

Add the following transforms with the specified features:

Transform 2

Weight: 0.95
linear3D = 0.2
spherical = 0.75 (try experimenting with values between 0.45 and 0.95)
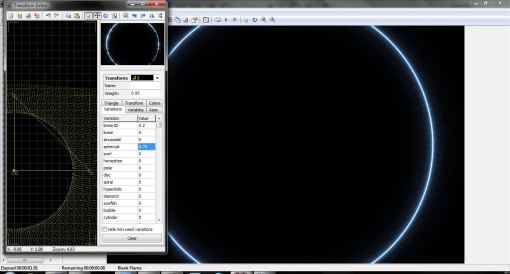
xform2

Transform 3

• Scale down twice by the default factor of 125 (try experimenting with scaling down (or up!) by a different factor)
• Move the transform to the left and and rotate (see photo for reference but experiment with placement and position)
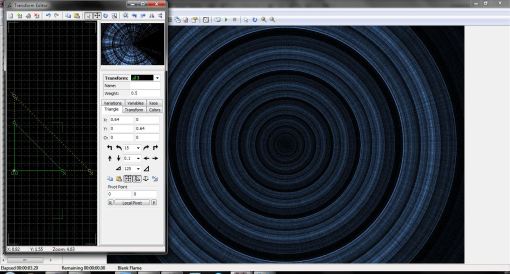
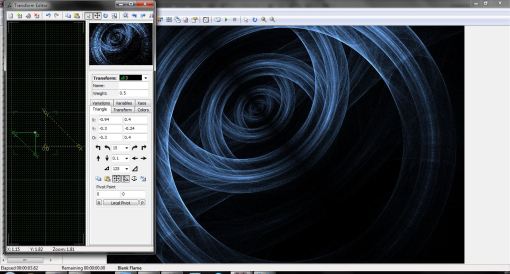
xform3 - scale twice

xform3 - move and flip

Transform 4

Weight 0.70
• Similar to transform 3, scale down twice by the default factor of 125.
• Move the transform to the left and and rotate. Note that this transform does not need to be placed in exactly the same spot as transform 3. See photo below for reference, but experiment with placement and position.
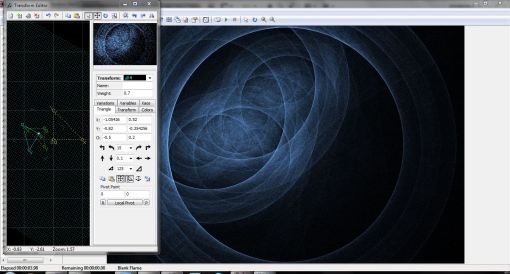
xform 4

Transform 5

linear3D = 0 (all variations should now be set to ‘0’)
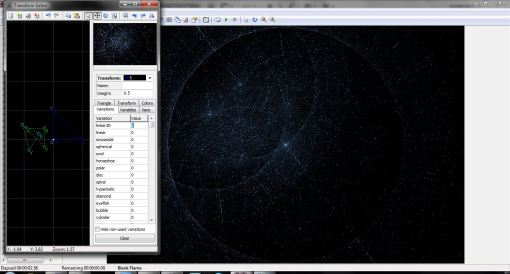
xform5

Transform 6

linear3D = 0
julian = 2 ; julian_power (Variables tab) = 2
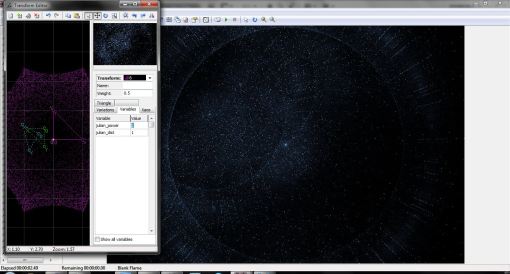
xform6

We’ve created all the necessary transforms. Now we’ll open up the adjustment window, and watch our fractal really take shape. Experiment with the pitch, height, yaw, and depth blur values. I used the following:

Depth blur: 0.2
Pitch: 60
Yaw: 10
Perspective: 0.7
Scale: 110
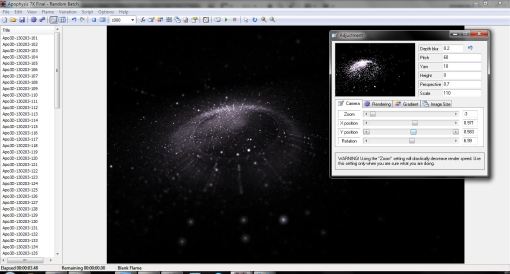
adjust pitch, blur, camera

(A note on scaling: for this piece I increased the scale but drastically decreased the zoom, thus allowing for about only 10 minutes of rendering time. Increasing the scale and zooming out this much does decrease quality somewhat, but as I had processing with Photoshop in mind for the final product, it didn’t matter. Adjust your fractal’s scale and zoom as you see fit.)

Switch to the Rendering tab of the adjustment window and change:

Gamma: 2
Brightness: 12
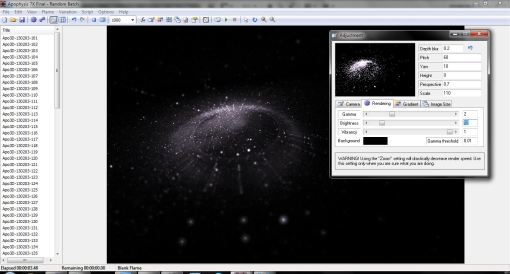
adjust brightness

Adjust the camera settings (rotate, X axis, Y axis) as you see fit. As I mentioned earlier, I zoomed all the way out. I also shifted the fractal up and to the right a little.

Now choose a gradient you like. I used a default. The gradient you choose will dramatically alter the way your fractal looks, so play around with it a bit. To spice things up a bit, hit the key combination ctrl+alt+n to randomize the color values.

When you’re happy, render your fractal! We’ll then open it up in our editing program to add some glitz (a word I never thought I’d use. Ever).

Open up your fractal in Photoshop. Set it to screen against a black background. (Ignore the fact that the screen shot says the blending mode is “Normal”. Heh heh. . .)
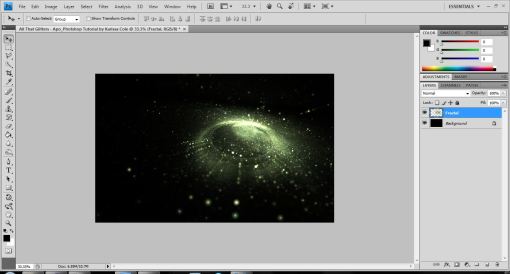
PS - 1

Create a new layer (ctrl+shift+n) [blend mode: normal] between your background and your fractal. With your circular gradient tool (shift+g x2) active, select a midtone color from your fractal (by alt+clicking). On this new layer create a gradient emanating from the center of your fractal. Lower the opacity of this layer, if need be.
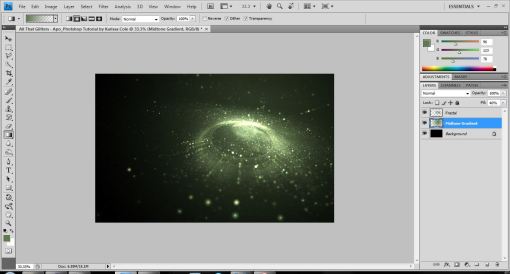
PS - 2

Create a new layer (ctrl+shift+n) [blend mode: screen] above your fractal. With the same midtone color and a large, soft, round brush (low opacity) selected, paint lightly near the center of your fractal.

We’re creating our base light source here, so think about which bit of your image you want to be lit the most, the least, and somewhere in between.
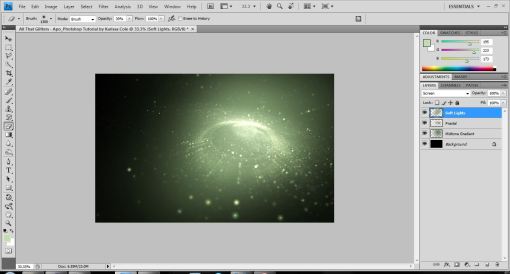
PS - 3

Create another new layer (ctrl+shift+n) [blend mode: screen] and repeat this process, only this time narrow down the beam of light you paint.
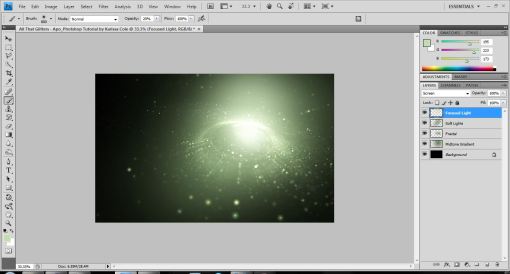
PS - 4

To add a lens flare create a new layer (ctrl+shift+n) [blend mode: linear dodge] fill it with neutral (black), and set the lens flare at the epicenter of your light source.
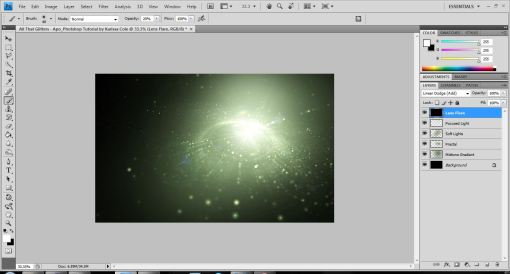
PS - 5

For more lighting effects, duplicate your fractal layer [blend mode should still be screen], rotate it 180 degrees, stretch it and position it so it looks like a light trail from something crashing into the center of your fractal.
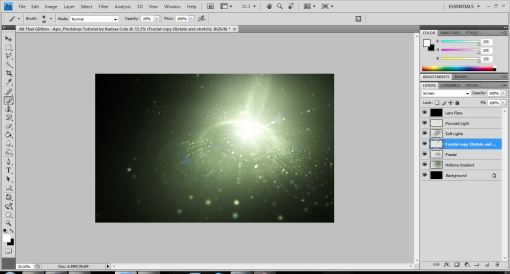
PS - 6

Continue duplicating your original fractal layer, warping it and positioning it in your image. Play around with the opacities of each duplicated fractal. (Be sure to erase any hard edges you may have during this part.) Optional: Create a color balance adjustment layer to fine tune your colors.
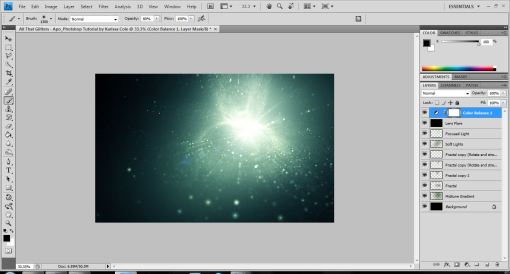
PS - 7

To add some neat finishing touches create a copy of all the visible layers (crtl+shift+alt+e). Duplicate this layer. To create a “glass-like” look apply the Smart Blur filter (default settings) to this layer. Lower the layer’s opacity a bit.
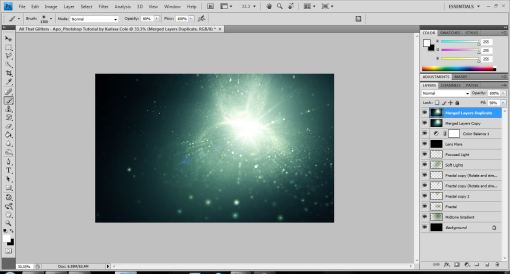
PS - 8

Fuss around with the colors and sharpness of the image until you’re satisfied. Then save your image. Done!

PS - 9 All That Glitters - Apo_Photshop Tutorial by Karissa Cole

Each of the following images were made using the techniques above:
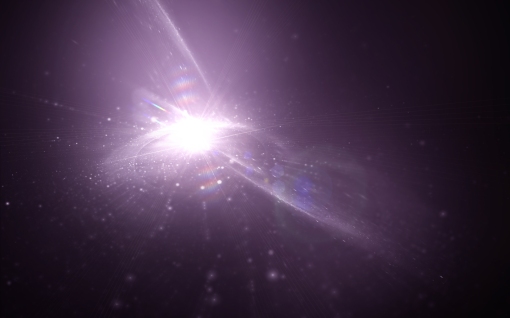
All That Gliggers - Wishing Well's Magic by Karissa Cole 2013

Party (2) by Karissa Cole 2013

All That Glitters - Epiphany by Karissa Cole 2013 all rights reserved (2) All That Glitters - Original Glitter by Karissa Cole 2013 all rights reserved

I only just stumbled across this method yesterday, so I don’t doubt that there are limitless variations one could come up with using these steps as a base. I highly encourage anyone to experiment and have fun!
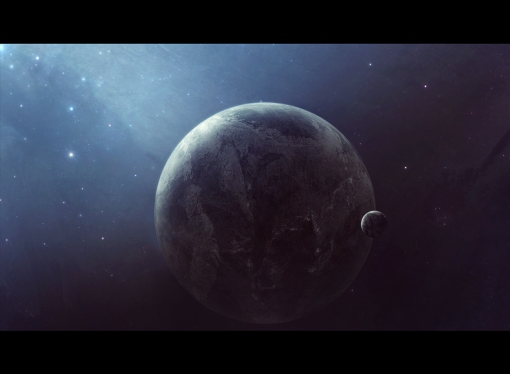
Caught in Hell

This afternoon seemed just perfect for playing my 80s mix MP3 and getting a bit of ‘scape practice in. So naturally that’s precisely what I did.

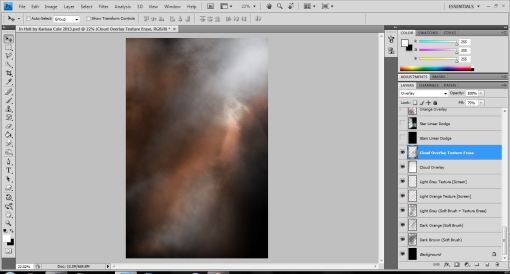
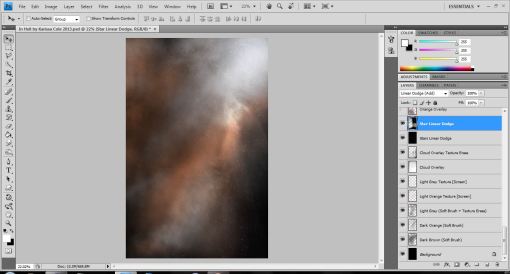
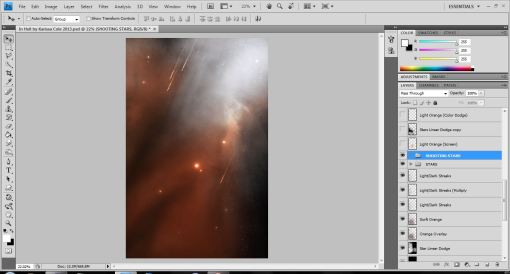
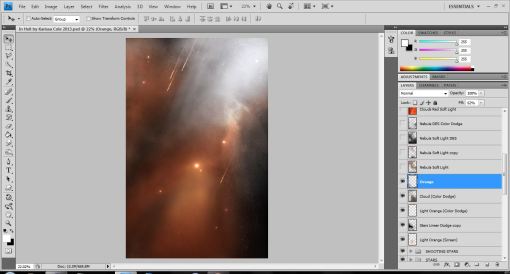
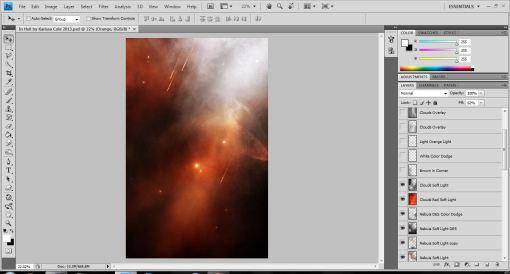
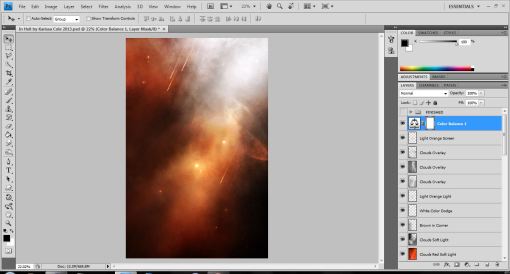
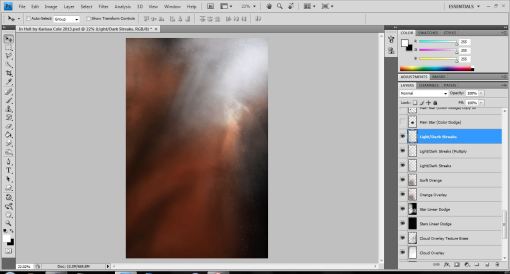
In preparation for the walkthrough/tutorial I will someday complete, I tried keeping this design simple, along the texture-ready lines, and I did my best to label and organize the layers, something I infrequently do. I think it came out okay, considering. Here are the screenshots:

1 - Base Layers

1 – Base Layers

2 - Lighting

2 – Lighting

3 - Base Stars

3 – Base Stars

4 - Depth

4 – Depth

5 - Larger Stars & Shooting Stars

5 – Larger Stars & Shooting Stars

6 - More Lighting

6 – More Lighting

7 - Texturing and Shadows

7 – Texturing and Shadows

8 - Touching Up & Adding More Colors, Textures, Shadows, and Lighting

8 – Touching Up & Adding More Colors, Textures, Shadows, and Lighting

As always, I’ll use what I learned from this session for bettering future ones. For instance, I have discovered that background 80’s music is perfect for rendering, so I will make sure to have it in abundance when I do tackle a full tutorial. But, then again, I have long been of the belief that 80’s music is perfect in just about all situations.

Final piece:

"Caught in Hell" (Disclaimer: title not indicative of mental or emotional state. At least not today.)

“Caught in Hell” (Disclaimer: title not indicative of mental or emotional state. At least not today.)

Walking through Space

WalkingThruSpace by Karissa Cole

Recently I was asked to create a tutorial regarding some of the celestial things I make. This is not it. Actually, this is, for lack of a better word, practice.

I’ve never actually made a full celestial-related tutorial before. I’ve done a few walkthroughs but no step-by-steps. This is probably partially because when I’m working in Photoshop I completely lose all track of everything – time, layers, processes – and just go with the flow, see what happens. That and I’ve never considered my work worth repeating. But there are a few beginners out there who, for now anyway, disagree and would like to know how I do what I do. So I thought it might be fun to rise to the challenge of creating something neatish and writing down the steps used so someone else could follow along.

The piece above is my very rough draft. A testing ground, if you will, for techniques and design aspects. I didn’t include all of the exact steps, but rather the general methods used. The final tutorial I create will most likely deal with a more complicated image in depth; this blue one is really very simple and didn’t involve all that much. But it served me well here, where I could use it to help myself figure out how I might want to lay out the future tutorial. I’ve taken my notes and learned what I need to improve upon for the final guide. Now I just have to, you know, make it.

I may end up back-burnering the tutorial for just a bit though, as, in other news, I’ve been in an amigurumi-making mood for a week or so and I’m just on a roll. Four new patterns are already either in the works or completely done.

I’ve also got another relatively big project in the works. Nothing too phenomenal, but there will definitely be some new stuff – ami patterns, short stories, illustrations, and new photo shoots – showing up soon. Somewhere in all of this the tutorial will be published, of course. Keep an eye out!
2012

I’m typically not one to get hyped up about the dawn of a new year. I don’t give much contemplation to the year beginning and I don’t do much reminiscing about the one ending. Every day’s just another day to me. Before you think jeepers what a dull outlook, let me expound upon my viewpoint: The way I see it, each day -whether it’s at the beginning of the year, the end, or somewhere in the middle- brings with it the possibility for change, for excellence and for new things. I don’t need a specific date to show up on my calendar for these things.

But for once something’s got me thinking about this past year, and everything that’s happened. For some reason I sort of want to send this year off right. I think because 2012 was full of so much more than I think I had expected: craziness and creativity, innovations and irritations, new patterns and old ideas, silly stories and celestial exploration; colorful photos and cute cats, random designs and ridiculous posters; deadlines, new jobs and old jobs,calculations, learning and teaching, trying and thinking, figuring, slacking, sneaking, illustrating, living and loving, laughing and growing.

Needless to say not everything this year had been great, but I think I’ll manage to come out of it with plenty of good things. In honor of all those good things, or at least the art and design related good things, I made up a 2012 project collage (click to view larger):

a look at 2012 on the ea1701 blog 6

Here’s to 2012; you really weren’t the greatest of years, but we sure had some good times together. Thanks go out to all those who shared the year with me, too; You’ve made the bad times tolerable and the good times even better.

Get ready for more craziness, creativity, and who knows what else to come in 2013. Because I’m just getting started.

___________________________________

Make sure you haven’t missed any of the good stuff! Check out some of the biggest projects of the year:

Fall in love with free amigurumi patterns such as Melvin the Misunderstood Monster; Purploids, Pinkloids and Bloops (Oh My!); and Counting Sheep

Get splashes of color in the indoor/outdoor photo shoots like Of Course, Naturally; Water Colors; and Sun Stretched Arms

Boldly go where no one has gone before without having to leave your seat: explore space in these celestial artworks.

Paint your world with the help of the very first tutorial posted to the ea1701 art and design blog.

Photoshop Tutorial – Photo to Watercolor Painting

“Watercolor Works” Photoshop Tutorial.

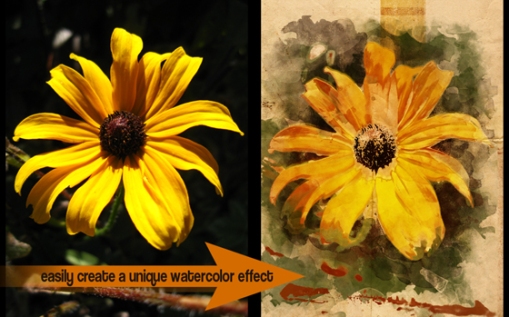
Preview Image Watercolor Photoshop Tut by Karissa Cole 2012

How to turn a photo into a watercolor-style painting in a few simple steps. Earlier this week I found a super simple way to bring new life to old photos. I posted my pieces here. And now, in my first tutorial, I’ll show the steps behind how I did them.

Tools used:

  • Adobe Photoshop CS4 (almost any graphics editing program capable of making and using custom selections and brushes will work, including GIMP, older versions of Photoshop)
  • Digital photograph of your choice (I recommend a photo with few but vibrant colors and a simple composition to start) I used a personal photograph
  • Watercolor brushes (I suggest making your own. In lieu of that free high quality brushes can be found at at Brusheezy or deviantART.)
  • Paper texture (again something that can be made at home or downloaded for free at deviantART or CG Textures.) I used Paper0007 (Texture: #6807) from CG Textures

Get your materials ready and then open up your editing program. (When clicked, the instructional images will open in a new tab so they can be seen larger.)

1. Bring your photograph and paper texture together in one document

With your materials ready open up your photograph in Photoshop. Press ctrl+A to copy the entire image, then ctrl+c to copy. Open your paper texture. Press ctrl+V to paste the photograph. Close the original photograph window. [Alternatively, if you know what size document you want create it and bring both photos in by copying and pasting.] Resize and position the photograph if necessary. Rename Layer 1 “Photograph.”

Save your PSD before continuing.

2. Select a color range, create a new layer, and begin painting

With the brush tool active (B) alt+click the part of the image you’d like to paint first. Once you’ve selected the foreground color, hit (X) and select the background color. The colors should be similar. [Selecting two slightly different tones directly from the image and then switching between those tones while painting helps create depth.] For my piece I selected two of the green tones found in the leaves of my image.

Now it’s time to make a selection based on these colors.  Go to Select>Color Range. . . a dialog box similar to the one below should appear

Select “Sampled Colors” from the dropdown box. Adjust the fuzziness setting as you see fit. Higher numbers = more is selected. 90 worked the best for this part of my image. Click OK when ready.

Without deselecting, create a new layer and name it after the color or part of the image you’re creating. [Since I was working with green my layer was aptly named “Green (1)”]. Hide the Photograph layer. On your new layer, with your range still selected, use  your water color brushes and begin randomly painting. Only “dab” the brush – do not drag it around. Leave a few spots empty to help build up the desired effect. If you have two tones, one foreground, one background, alternate between the two. When you’re satisfied  crtl+D to deselect. Painted too much? Use a watercolor brush to randomly erase any excess color. Also be sure to gently erase any hard edges.

Continue this process for each color you wish to represent. You will need to show the photograph layer in order to pick the next color range, then re-hide it as you begin painting on a new layer. (Layer order is unimportant. Keep each layer’s blending mode on “Normal”.)

3. Enhance colors and textures (optional step)

Duplicate the paper texture and the photograph layers, bringing them above all your other layers. Set them both to Soft Light.

Make color adjustments as you see fit. I ended up using a photo filter and a color balance adjustment mask to saturate the colors. Once you’re satisfied save your image.

Done!

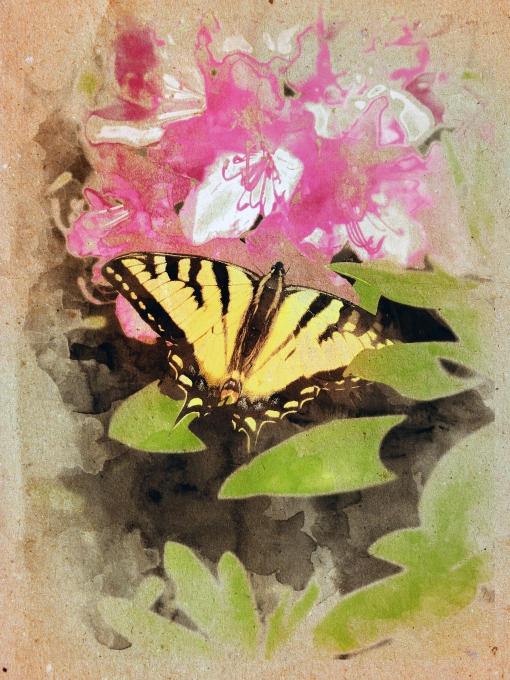
the Butterfly - Watercolor by Karissa Cole 2012 all rights reserved

Enjoy your result. I’ve found these kinds of images make great greeting cards and wall art pieces. Vary your subject matter, though, and you can do anything. Try working with photos of people or a cityscape to get some really awesome results! Also, try leaving one main color out of your image to create an interesting 3Dish effect.

justcreateandscrap.wordpress.com/

Love, imagine, create, scrap, live.

Jee's Studio

Passionnée de scrapbooking, retrouvez ici mes créations ;)

Doodle Addicted

All drawings © Heidi Denney unless otherwise noted

Watercolor Journal

... a place for people with a passion for art

The Poetic Monster

Just a Few Words From a Shy Beast

L&K's Creative Threads

Distinctive Children's Clothing and More

BitterSweet

Sweet Musings with a Bitterly Sharp Wit

[ One Velvet Morning ]

Project Life Freebies, Printables & Digital Scrapbooking Templates

Awesome Wallpapers

Hand-Picked, High-Quality Widescreen Walls

ea1701

art and design (and other stuff, too)

Karissa Cole Design Portfolio

I have a brain and I'm not afraid to use it

Awkward Soul Designs

Knitting, Crochet & Amigurumi Patterns